Pages

Showing posts with label #ewew cooks: Miscellaneous. Show all posts

Monday, 16 July 2018

#ewew cooks Cottage Pie

Cottage pie or shepherd's pie is basically a meat pie with a crust of mashed potato.  The meat used is usually ground beef or ground lamb which is cooked in a tomato gravy of onions and vegetables and topped with mashed potato.

It seems it should be called cottage pie (if ground beef is used) and named shepherd's pie (if it's ground lamb).  Well, now I know.  So, I guess I'm making Cottage Pie then (though nowadays both names are used interchangeably).  I suppose you can also substitute it with ground chicken or pork if you like (but I won't know what fancy names to call those pies other than chicken or pork shepherd's pie...kekeke!).

This recipe is inspired by Patricia Heaton and Jamie's Table which I've tweaked and simplified further.  I don't mind sacrificing a bit of the taste if I can save on buying more spices and seasonings which I'm not able to use up.

Ingredients:

1 packet minced beef (the one I got was about 260g)
4 medium potatoes
2 ribs of celery, diced
1 medium carrot, diced
1 small onion, diced
1/2 a red capsicum, diced
2 cloves garlic, minced
2 stalks of Chinese coriander, chopped
2 knobs of butter (I use those 9-in-1 mini packs)
4 tbsp tomato puree (you can add more if you like it wetter)
1 tsp (dry) mixed herbs
Salt & (freshly cracked) black pepper to taste

Preparation:

Make sure the diced vegetables (of onion, carrot, bell pepper and celery) are cut uniformly as this will ensure that they all cook at the same time.  The quantity of each of the diced vegetables is about 3/4 of a cup.

Method:

Pour in a tbsp of olive oil into a hot pan and put in the ground beef.  My recipe has a reduced amount of meat used as I wanted more vegetables than meat in my pies.  You can 'beef up' the beef (double the portion if you like).  Once the ground meat is in, season with 1 tsp mixed herbs, 1/4 tsp salt 1/8 tsp black pepper.  You can use 1 tsp of chopped fresh thyme if you have.  I didn't, so I substituted it with 1 tsp of mixed dry herbs of rosemary, thyme, marjoram and basil (I 'invested' in this seasoning recently since it's so versatile with a mixture of four herbs which I can use on a lot of stuff).

Saute the meat on relatively high heat to get it nicely seared (I learned that from Tobie Puttock's video on Jamie's Table).  Cook it for about 3 minutes until it's nicely browned.  Remove the cooked meat onto a dish.

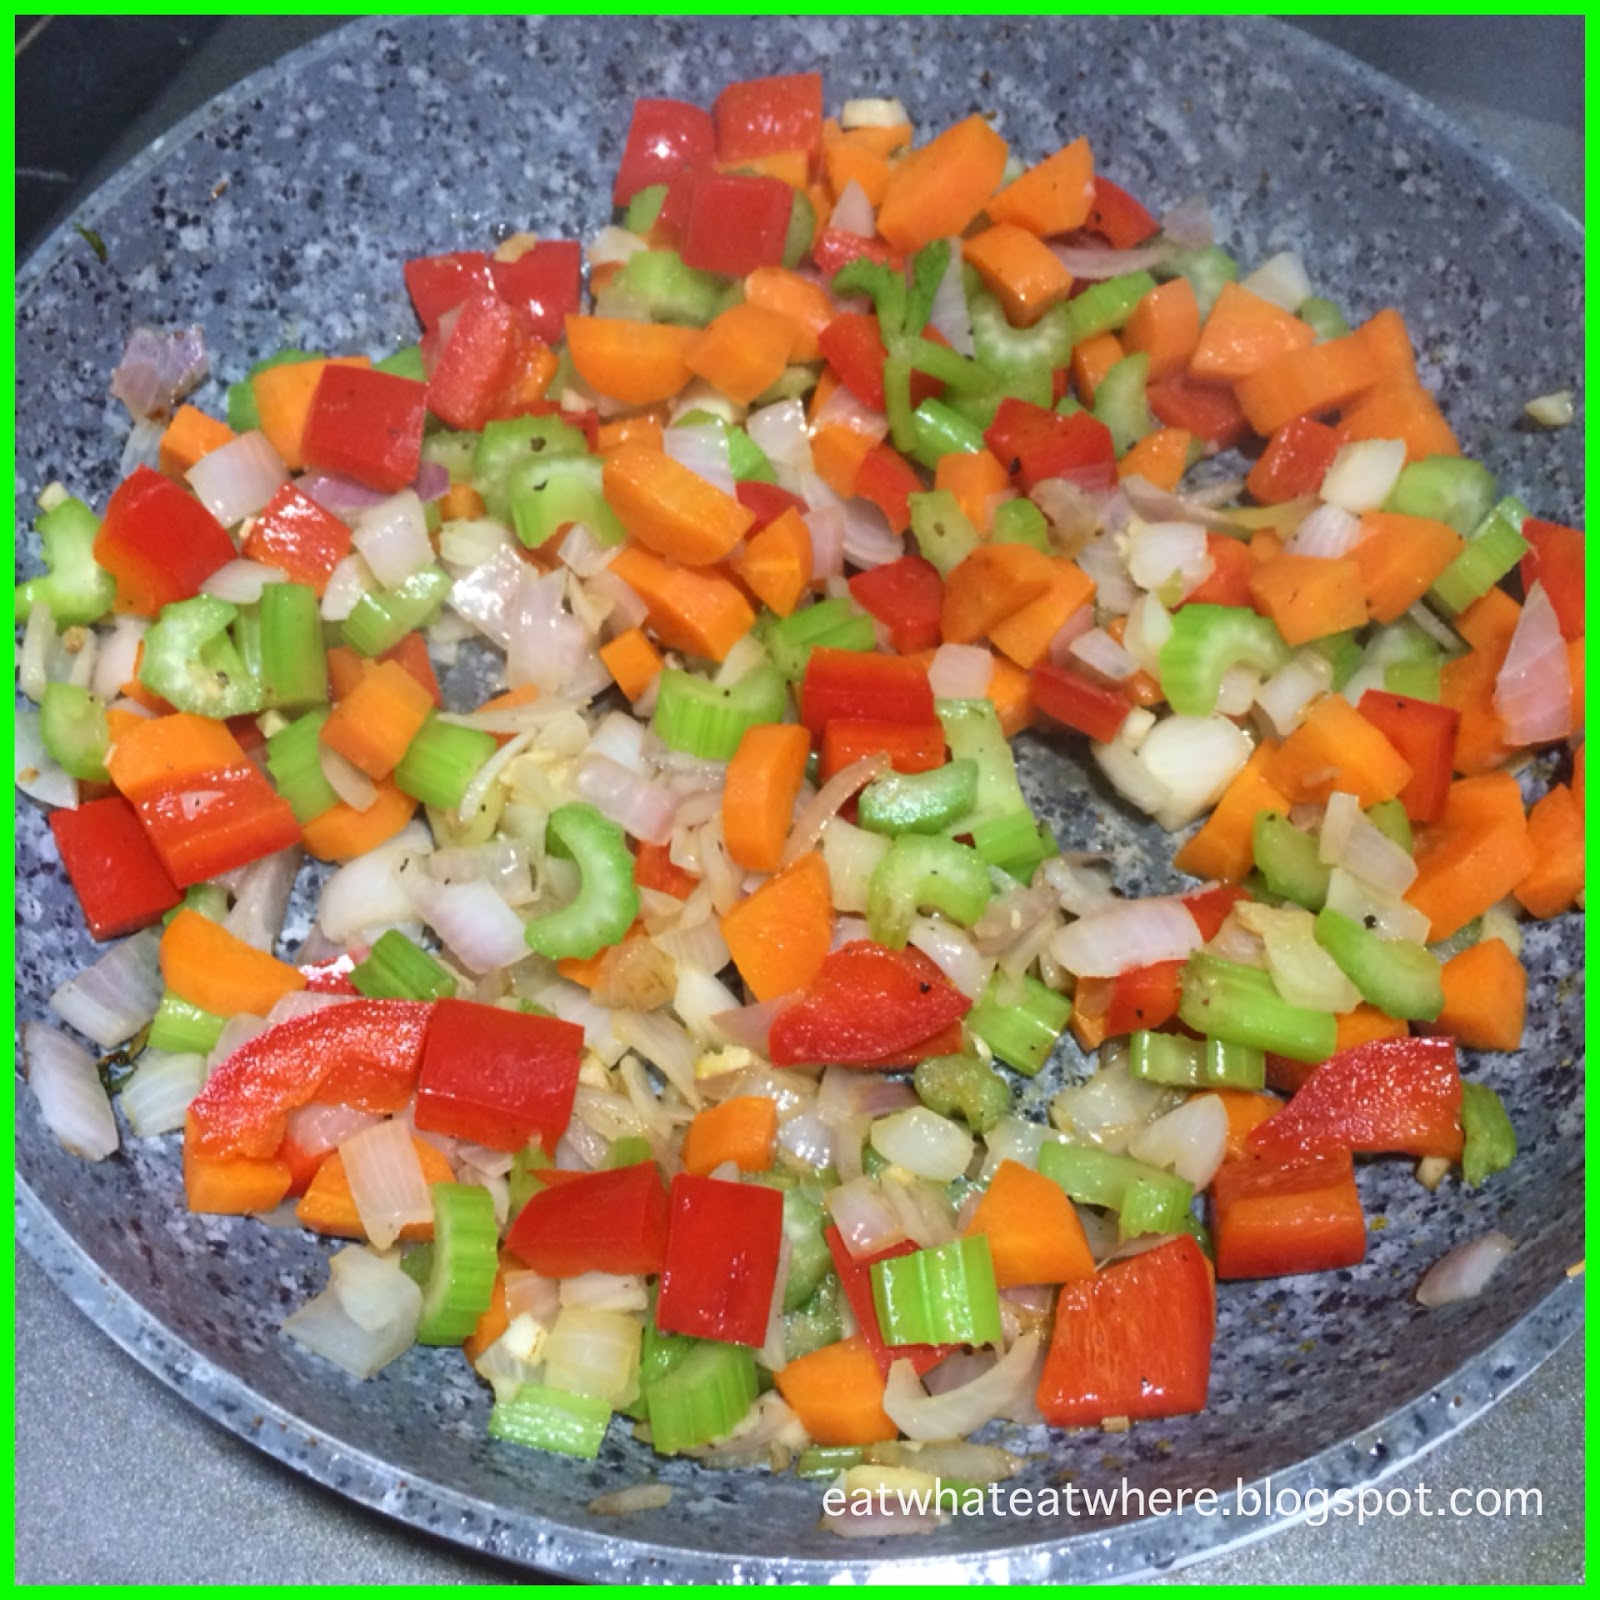
Next, put in all the vegetables (of onions, carrots, capsicum and celery) together with the minced garlic too in 1 tbsp of olive oil and saute for 5 minutes.

Again, season with 1/4 tsp salt 1/8 tsp black pepper.  The vegetables are so pretty and colourful, don't you think?

Once the vegetables start to soften, add back the cooked beef mince to the pan.  To that, add 4 tbsp of tomato puree (add more if you want a more tomato-ey taste) and 1/2 cup water (use fresh stock if you have) and simmer on medium low heat for 5 minutes.

I bought this bottle of fresh tomato puree from Mercato (coz I liked the jar!) and found that it only cost RM6.99 for 720 ml (quite a bargain for a product of Italy since Italian tomato puree is known to be the most acclaimed variety, no?).  Anyway, I like the taste of this tomato puree as I find it not as acidic as some of the ones I've bought before.  I think I should have added more tomato puree into my mixture.

I improvised and substituted fresh flat-leaf parsley with coriander (since there weren't any at the supermarket when I wanted to make this).  Add chopped coriander (I like a lot) towards the end and simmer for a further minute until the sauce is almost dry.  If you want to include green peas into the mix, you can. Just add frozen peas in the last minute and stir them in (the baking process will cook and soften the peas).

And the Cottage Pie filling is done.  Let it cool.

In the meantime, make the mash.  In a heavy saucepan, season the water generously with salt and bring to a boil.  Put the potatoes in and parboil until soft.  Once a fork easily pierces through the potatoes, you know it's ready (which is about 15 minutes).  Drain the potatoes thoroughly.

Add 2 knobs of butter to the potatoes while they're are still warm, season with salt and black pepper.  Mash. You can also add milk or cream to the mash but I didn't, so I loosened it up with a little water (stock would be more flavourful if you have).

By now, the filling would have cooled a little for you to spoon into ramekins.  Fill it slightly more than halfway up and the rest of the ramekin can be filled with the mashed potato.

Top the balance of the ramekin with the potato mash and press down to seal the edges.

I don't have those fancy tips to pipe in the mash, so I just use a fork to press down or poke at the mash to create ridges as this will give rise to crusty edges.

Finally, sprinkle a pinch of salt and black pepper and drizzle a little olive oil over the top of each ramekin. You can sprinkle some cheese on top too if you want.

Put the ramekins on a lined sheet pan (that's in case the filling bubbles over).  Bake at 200°C for 30 minutes.

The Cottage Pie is done once the mash turns a nice golden brown.

The filling was more than enough to fill 4 ramekins (I was left with extras to fill another 1 - 2 ramekins) but I had run out of mash (so you'll need to adjust the amount of potatoes needed...rule of thumb is one potato for each portion/ramekin...and when you increase the potatoes, you have to increase the butter too, of course).

You can keep the extras and make a pasta dish out of it by adding more tomato puree (and that makes a wonderful meal in itself).

You can also choose to make a layered casserole by spooning all the vegetables (and mash) into one large casserole or you can do it like I did here, into small ramekins, one for each person (maybe two if you're feeling peckish).

This was my second time making Cottage Pie...but my first attempt at making it from scratch.  Hmmm, I think I pretty much nailed it! ;)

The previous time I made a Beef Shepherd's Pie was through a dinner box provided by (the now defunct) Urban Stove that looked something like this...it wasn't great looking nor great tasting (that's why it's defunct...wuahahahaha)! :D

Mine (made from scratch) definitely looks better presented...and it was better tasting too.

It's a wonderfully comforting dish.  Just imagine curling up in the cold air-conditioned comfort of your home and out comes this hot mash and still bubbling beef and vegetable stew to warm your heart.  Simply yummy. ^.^

Because it's a dish of meat and potatoes, it can be a little heavy, so it'd be best to serve it with some green leafy vegetables (like a fresh arugula salad with cherry tomatoes or sauteed broccolini or, in this case, stir-fried pea shoots) to offer a fresh bite.

The potato mash was really nice, buttery, soft and fluffy on the inside with nice crispy edges on the outside. Eaten with the bubbling hot beef and vegetable stew, it was hearty and delicious. ^o^

If you want a vegetarian version, you can too....just omit the ground beef.  It should still taste good...and you can call it a 'shepherdless' pie....hihihi! ;D  And if you add a sprinkling of breadcrumbs (and cheese) to the mashed potato topping, it turns into a cumberland pie!  So, whether it's a cottage, shepherd's, 'shepherdless' or cumberland pie...try making one today and you'll realise that the name just sounds fancy but it's actually quite simple to make.

I wasn't expecting it to be so successful actually.  If you're having a party and want to spend as little time as possible in the kitchen or away from your guests, then this Cottage Pie is certainly a contender as a main since it can be prepared ahead of time and put to bake when your guests arrive.

Give it a go at making this savoury, comfort-food classic.....who doesn't like meat and potatoes, right? ^_~

Serves 3 - 4 (mashed potato was enough for 4 ramekins but filling was enough for 6)

Wednesday, 16 December 2015

#ewew cooks Roasted Honey Soy Chicken by Urban Stove

With an acceptable Meal 1 and the disastrous Meal 2 already done and dusted, I've come to my last and final Meal 3 of my second dinner box by Urban Stove.

I've become somewhat weary of what awaits me in Meal 3 which is the Roasted Honey Soy Chicken with Pumpkin Salad & Jasmine Rice.

The Ingredients:

Marinated chicken, bean curd  skin, pumpkin, Japanese cucumber, crushed peanuts, sesame seeds, salad dressing and jasmine rice.

The Recipe:

Simply follow the instructions on the recipe card.

 The Prep Needed:
 
Julienne the pumpkin (you need some mad chopping skills for this as the pumpkin is really hard) and cucumber into thin strips and cut the bean curd into cubes.

The Cooking:
 
 
Place the marinated chicken on a tray and roast in a preheated oven for 30 minutes (the recipe didn't say what temperature to roast the chicken at but, based on my cooking experience, I know it should be between 180 - 200C).

Fry the bean curd squares in some hot oil until they crisp up and place them into a bowl with the julienned pumpkin and cucumber.

Dress the salad with the pre-prepared salad dressing and add the crushed peanuts into the mix.

Remove the cooked chicken from the oven and finish it with a sprinkle of sesame seeds.

Place the salad onto a serving plate and top with the roasted chicken pieces.  [#Note: Although the recipe called for jasmine rice to be made, I omitted it coz I felt that the dish of roasted chicken (without any sauce) and a western-style salad just don't go with rice.]

So, here's my plated Roasted Honey Soy Chicken with Pumpkin Salad (minus the jasmine rice).  This is supposedly a portion for one with just two miserable pieces of chicken (from the chicken drumstick, it wasn't even one whole chicken leg)...I think they could have given a bit more.

And because I left out the carb (the jasmine rice) for this dish, the portion for one wouldn't be quite enough and I ended up eating both portions of chicken with the salad as my main meal...which obviously made this dish rather pricey at RM38 (or RM28 in my case).

Conclusion:

The Positives:
There's nothing to fault as far as taste is concerned as the roasted chicken, with its honey soy coating, was tasty and the crispy bean curd squares and salad provided the crunch (although the raw pumpkin strips were too hard to eat, maybe it could have been julienned more finely, I suppose).

The Negatives:
1)  Pairing the dish with jasmine rice wasn't the best combination
2)  Portion of chicken could be more than just two pieces per person
3)  Raw pumpkin is a bit hard for a salad
4)  Pricey for a dish that ended up good enough for one only

Final Comments:
Overall, this second dinner box turned out to be a disappointment compared to the first one.  However, I still think the concept is a good one but they just need to come up with the right (ie. failproof) recipes, the right (ie. better) portion sizes and the right (ie. lower) price.  I personally feel that the way they pack their meals is costing them too much and eating into the cost/price of the meal and they need to find a way to reduce the packaging costs in order to improve on the portion sizes.  On that note, you'd be glad to know that the price for 3 meals for 2 has been revised downwards to RM98 instead of RM115 (making the price per meal at RM16 instead of RM19)...which is a move in the right direction, in my opinion.  Now, they just need to get the right recipes and the recipes right! ;)
 

Wednesday, 9 December 2015

#ewew cooks Golden Tofu Croquettes by Urban Stove

After an acceptable Meal 1 of Pan-Seared Seabass on Red Capellini Primavera, I'm onto Meal 2 of my second dinner box by Urban Stove.

It's the Golden Tofu Croquettes with Spicy Asian Slaw!  Doesn't look very appetising, does it?  Coz it wasn't....it was a disaster waiting to happen!  [#P/S: I didn't even bother to plate it up nicely as I knew it would be inedible.]

The Ingredients:
 
Croquette mixture, cabbage, carrot, jicama, tomato, spring onion, salad dressing and spicy sauce.
 
The Recipe:
 
Simply follow the instructions on the recipe card.

The Prep Needed:
 
Julienne the vegetables (carrots, cabbage, jicama, tomato and spring onion) into thin strips.  You'd need a bit of knife skills to pull this off successfully (mine wasn't that finely cut).
 
The Cooking:

Toss the julienned vegetables with the pre-prepared salad dressing (that tasted like some kind of nut/sesame sauce dressing).  Salad is ready....that's the easy part!

Now comes the hard part....frying the croquettes!  It was hard to do because the croquette mixture (made of tofu and potato) was incredibly soft to shape and had a gummy texture.  When I emptied it from the packaging, I already realised that they were way too soft.  It might look alright in the pan......until you want to flip it!  It disintegrated into a pile of mush!  Into the bin it goes....this first batch! :(  I tried putting the croquette mixture back into the fridge to firm up.

And tried a second time.....it looked slightly better, I managed to flip it....but it was still a mush!  Then, just reheat the pre-prepared sauce (for the croquettes) that tasted like some kind of slightly spiced satay sauce.

Anyway, here's my failed attempt at making Golden Tofu Croquettes with Spicy Asian Slaw.  In the end, the second batch of croquettes ended up in the bin too...it was downright inedible!  It was so mushy, it had the consistency of 'baby food' and you can taste the uncooked flour mixture...yuck, yuck and yuck!

The recipe card described it as a cross between a croquette and a bergedil (a kind of Malaysian deep fried potato patty) that's moist on the inside, golden on the outside...but it was nothing remotely close! O_o

In the end, all that I was left with that was still edible was the Asian slaw.....a very costly salad at RM38 (RM28 in my case since there was a 25% discount)!! T_T

Conclusion:

Meal 2 was, unfortunately, a recipe for disaster! T_T

The Positives:
1)  The portion of vegetables were more than enough for 2 persons (I only used half the vegetables).
2)  The pre-prepared salad dressing and spicy sauce (for the croquettes) were nicely done.

The Negatives:
What else!  The croquette mixture, of course!  I think the croquette mixture failed 'big time' because tofu was in the mix.  Tofu, as we all know, has a very high water content and the mixture was probably compromised in its packed form (and the tofu could have leaked water from the time it was packed to the time it reached the consumers).  Also, the ratio of tofu to potato wasn't right to begin with, making it too wet and mushy in the first place.  It baffles me as to how this recipe could have passed testing and quality control.  What they really need to do is get someone independent (not the chef who created the recipe) to not only test it out...but test it out in the same conditions as a would-be consumer would do before rolling the recipe out.

Up next.....final Meal 3!
 

Thursday, 3 December 2015

#ewew cooks Pan-Seared Seabass by Urban Stove

I have tried Urban Stove's dinner boxes before  and thought the concept was great as it offered novice cooks a chance to cook a restaurant quality dish in the comfort of their homes.

When delivery of my first dinner box didn't quite come up roses (due to the delivery boo-boo) and I subsequently made a complaint to Urban Stove, they immediately offered me a 25% discount on my next box (which I took up, of course).  So, this box cost me RM86.25 (instead of RM115), thus making it about RM14 per person per meal.

So, here's Meal 1 from my second Urban Stove dinner box....Pan Seared Seabass on Red Capellini Primavera.

The Ingredients:
 
Seabass fillets, capellini, celery, leek, zucchini, onion, garlic, thyme, tomato puree and chicken stock.

The Recipe:

Simply follow the instructions on the recipe card.

 The Prep Needed:
 
Mince the garlic and finely dice the celery, leek, onion and zucchini.
 
The Cooking:

Saute garlic and onions in olive oil till soft.  Add chopped up celery, leek and zucchini and stir-fry for a couple more minutes.

Add the tomato puree and half the thyme, stir for another minute.  Add  the chicken stock and simmer for 5 minutes or until the vegetables are soft and tender.  Season with salt, pepper and a bit of sugar.  The sauce is done!  Unfortunately, the celery takes a longer time than the rest of the vegetables to soften and, even though I simmered for double the time, the celery was still crunchy in the end (the recipe should have told us to add the celery first) and the sauce wasn't reduced (ended up with quite a watery sauce).

Cook the capellini in salted boiling water until al dente.  Drain and toss in some olive oil to keep it from sticking together.

Next, season the seabass and pan fry in olive oil.  The recipe asks that you pat the fillets dry.  The extra step I took last time when I cooked the Crispy Seabass by Urban Stove (which was not in the recipe card) was to dust the skin with some flour.  I didn't do it this time and ended up paying the price with the seabass sticking to the pan and the skin not crisping up so well.

The food is ready to be plated and served.  Pour the red primavera sauce into the centre of your serving plate.  Twirl the capellini on top and top with the pan-seared seabass.  Finish with a sprig of thyme for decoration.

And here's my Pan-Seared Seabass on Red Capellini Primavera by Urban Stove.  Overall, it was edible, the pan-seared salmon was fresh and flaky but the primavera sauce wasn't thick enough to coat the capellini, so you end up eating an almost soupy kind of pasta.

Oh yeah, and the portion of pasta given was too little for 2 pax...I ate up 1 1/2 portions actually! >.<

For my son's plate (who doesn't like anything in a tomato-based sauce), I fried some (from my own stock of spaghetti) with dark soya (Chinese-style) and topped it with some fried shallots that was already available in the kitchen.

Just look at how thin the portion of fish was!  It was definitely thinner than the one I had in my first dinner box.  Maybe, that's why I had a harder time frying and flipping the fish!

Now which plate do you think looked more sumptuous.....the one I simply fried on my own above ;)

.....or the one from Urban Stove?  Kekeke! ;D

Conclusion:

Meal 1 was just acceptable.  This pan-seared seabass wasn't as good as the crispy seabass from my first Urban Stove's dinner box.

The Positives: 
Seabass fillet and vegetables were as fresh as they can be.

The Negatives: 
1)  Seabass fillet was a bit too thin
2)  Celery didn't soften at the same time as the other veggies
3)  Cooking time in the recipe wasn't on point
4)  Sauce was too watery
5)  Portion of pasta could be more

Coming up next.....Meal 2!
 
Related Posts Plugin for WordPress, Blogger...