Pages

Showing posts with label #ewew cooks: Soups. Show all posts

Wednesday, 11 May 2022

#ewew cooks Chinese Spinach Soup 2.0

Just like choiyen.com who blogs many recipes of soups, I'm also a soup lover myself.  I'm good to go with just a nutritious bowl of soup as my one-dish meal with a bit of rice.....must have a little rice...hee..hee! ;)  For boiled soups (and I prefer the taste of double-boiled soups), we need a bit of time to extract all the flavours from the meat and vegetables.

But when we're pressed for time, we can make a super quick guan tong which takes little to no time at all to serve up...and I was reminded of one such soup with Yen's Quick Spinach Soup.  Though she made it with spinach (you know that vegetable made famous by Popeye the Sailor Man, we know it as poh choy), I'm making mine with Chinese spinach (otherwise known as amaranth greens or bayam hijau).  

I've cooked this Chinese Spinach Soup before but I feel this one tastes better, so I thought I'll share my upgraded Chinese Spinach Soup 2.0.....lol.  I've been referring to spinach as yin choy in Cantonese (as it's commonly translated/spelt/pronounced as such online) but have regularly gotten akward glances from restaurants/market vendors when they ask me if it's hin choy I wanted.  Have I been mispronouncing it all along? >.<

Compared to boiled soups which can take up to 4 hours or double-boiled soups which take even longer, this is a super fast style of making soup simply referred to in Cantonese as guan tong, literally also translated as boiled soup, but the guan (or boiling) here is a super quick boil which literally takes just 10 - 15 minutes to be ready.

Chinese spinach soup is nutritious and delicious but we don't make it often enough coz many of us are put off by the tedious preparation and washing of the vegetable.  You have to pluck the stalks backwards to discard the fibrous strands followed by countless washing and rinsing of the vegetable to get rid of the abundant sand trapped between the leaves.  Well, if you don't want to deal with all that, you can get the baby Chinese spinach (hin/yin choy mew) instead which is much easier to clean and prep.

But I made the soup this time with regular (not baby) Chinese spinach this time.  Well, if you want to drink a good soup, you need to put in the effort lah.  I also feel the regular Chinese spinach holds better than baby Chinese spinach in soups.  I'll tell you why later.

This is a soup that does not need a recipe as it'll still turn out great even if you don't adhere to measured ingredients.  To make this soup (I'm making for one person), you start by frying up an egg (lightly seasoned with salt) in some oil.  Break them into pieces with your spatula and set it aside.  This was my first change in making this 2.0 version.  Previously, I cracked an egg into the soup (when the soup was almost done) which made the soup cloudy (and more like an egg drop soup).

Next, you get a simple broth going by frying a handful of ikan bilis (dried anchovies) with two chunks of lightly flattened ginger (which is easier to remove than pieces of sliced ginger) in some oil.  I decided to omit chopped garlic this time as it can easily burn if we're not careful (+ I don't wish to taste burnt nor bite into almost raw garlic in my soup).

Once the ikan bilis has nicely browned, add in a (big) bowl of water.  I just use the bowl size where I'd be happy with the portion I'm going to eat and that will be the amount of water I need...hah..hah.  Simmer the ikan bilis stock for 10 minutes to extract the flavours.  Season to taste.  You can then strain the soup and discard the ikan bilis (and ginger) but I leave them in as it's still edible (I just remove the chunks of ginger).

Then add in the Chinese spinach and cook till soft (around 3 minutes) or longer if you like your greens softer.

When the vegetables are at its desired softness, add the already fried egg pieces back into the mix......

....followed immediately by the chopped salted egg (ham dan that needs to be cooked first like hard-boiled eggs) and preserved century egg (pei dan that doesn't need any cooking).  I used half an egg each for soup meant for one person.  You don't need to cook this at all but to just mix it into the soup....and my Chinese Spinach Soup 2.0 with 3 types of egg is ready.

A salted duck egg cured in a thick crust of salted clay mix or charcoal paste might seem off-putting (to non-Asians) but it's perplexing how something so vile looking hides something so good inside.  I used to dislike cleaning the mess of ash/clay off the salted egg but just had to do it coz something delicious comes out of it.

Cleaning the century egg wrapped in a clay/ash mix and rice hulls is even worse as, after removing the outer layer of rice hulls, the ash paste feels like damp mud...yucks!  Westerners might think why we'd want to eat something that vile smelling (stinks to high heavens to haters!) but wonderfully pungent smelling and tasting to those who love them...lol.

That aside, it's a super quick soup to make....and a light soup to drink with lots of good for you greens. Sprinkle over some crispy fried tiny anchovies for that added crunch.  These tiny anchovies go by many names...blue-eyed anchovies, ikan bilis mata biru, ngan yu chai, whitebait or silver fish (not the pesky pest kind!).  I like to eat them (I even add my own into nasi lemak) as they are super crunchy and extra fragrant (and more expensive than the regular kind too).

One of the first changes I made to this Chinese Spinach Soup 2.0 is the use of regular Chinese spinach instead of baby ones (yin/hin choy mew).  I thought the larger leaves and thicker stems held better when boiled to retain a good bite instead of being too soft if baby spinach was used.  I think the baby spinach works better in a quick stir-fry with garlic as it tends to soften much faster.  I know it's a lot more work to clean regular spinach but you just got to do it....no pain, no gain, right?

The second difference was to fry the egg separately instead of cracking it into the soup.  That way the soup will not be so cloudy + fried eggs also tastes better, won't you agree?  I also omitted wolfberries (doesn't do anything to quick-boiled soup to impart any additional flavour) and garlic (as biting into softened chopped garlic isn't all that pleasant unless the garlic spooned over the soup is fried, crispy and browned).

The third change was the addition of century eggs which I feel is really necessary as it brings a more unique flavour to the soup overall when eaten with the Chinese spinach.  The century eggs we buy outside are not quite in the same league as those we get at restaurants that serve them (the yolks of those are more custardy, gooey and soft...and absolutely decadent eaten with vinegared ginger).  So, the lower quality century eggs with firmer yolks work great in a soup like this.

I felt that the few changes I made to my Chinese Spinach Soup 2.0 made it better.  That's what cooking is all about.....we improve as we go along and begin to understand each ingredient better and how to use them in the best possible way.  The more we cook, the more we practise, the better our food becomes.....and that's a fact! 

Guan tong is a super quick way of getting a soup on the dinner table when we don't have the time.  You can make it with just about any type of vegetables in a simple ikan bilis stock like Chinese green spinach (as I've done here), Chinese red spinach (if you don't mind your soup having a red hue), spinach (poh choy), Chinese flowering cabbage (choy sum), lettuce (sang choy), cabbage, bok choy, Chinese cabbage (pak choy) or any leafy vegetable you fancy (green or otherwise).  I'd be totally happy with a simple, quick to make soup like this.....and a bit of rice for dinner. ^_~

Monday, 27 August 2018

#ewew cooks Vegetables & Tomato Soup

After making Cottage Pie, I still had quite a lot of tomato puree left which I needed to use as soon as possible since the instruction on the bottle mentioned to keep refrigerated once opened and finish in two days.

So, what better way to use up a lot of it then to make a healthy Vegetables & Tomato Soup.  I've made Borsch Soup before (but with a different brand of tomato paste) and this is almost similar, only thing is that this version is meat-free (and by that I mean there's no meat in the soup) but not totally meat-free (as the stock is still made from chicken bones).

Ingredients:

1 medium carrot, diced
1 small onion, diced
2 ribs of celery, diced
1/2 a red capsicum, diced
2 stalks of Chinese coriander, chopped

For the stock:
1 chicken carcass (you can also use chicken off cuts)
1 litre water
1/2 tsp salt (or to taste)

Preparation:

Besides chopping up all the vegetables, you need to make a chicken stock (you could substitute with water if you're too lazy to make the stock).  Wash the chicken pieces thoroughly and remove any visible fats on the carcass.

You can make the stock in one of two ways.  Blanch the chicken carcass (that has been chopped into large pieces) with hot water for about a minute.  Remove the chicken pieces and put them into 1 litre of cold water (season with salt to taste) and bring to a boil.  Simmer on medium-low heat (uncovered, if you're using a small pan, like me) for about 30 minutes.

I would switch off the heat, put the lid back on and let the stock steep in the chicken bones for the next half to one hour (or until I'm ready to make the soup as I always make my stock ahead of time).  But if you don't have the luxury of time, then discard the chicken pieces and use the stock immediately.  The resulting stock will be a delicious, clear chicken broth that's ideal for making clear soups.

The other method would be to saute the chicken pieces in a hot pan first with some olive oil until they're browned.  I sometimes use leftover chicken off cuts for this purpose (nothing goes to waste).

Then add the chicken pieces to the water to make your stock (don't forget to season with salt).  I always under-season my stock base as I can always tweak it when I build my layers of flavour later.  The stock should reduce to about 700 - 800ml after 30 minutes of simmering.

The resulting stock will not be as clear as the first method but I chose to do it this way (for this recipe) as I believe it adds depth of flavour to the soup base.  Plus, since this is a tomato-based soup, it doesn't require the stock to be clear.

Method:

Put in all the vegetables at once (season with 1/2 tsp salt and a pinch of freshly cracked black pepper) and saute them in olive oil for about 5 minutes.

You don't need to brown the vegetables, just sweat the onions and soften the vegetables slightly over medium-low heat.

It's ok if the vegetables aren't soft enough at this point as the boiling process later will render them softer. Add the chopped coriander (or parsley if you like) right at the end.  I prefer coriander as it's readily available at the wet market + it gives the soup the added fragrance that I like.

Into the stock, add all the sauteed vegetables and simmer for another 10 minutes until the vegetables begin to soften.  Season with another 1/4 tsp of salt and 1/4 tsp of black pepper.

To that, add 1 cup of tomato puree (an additional 1/2 cup if you like your soup thicker with a more intense tomato flavour) and simmer for a further 10 minutes until all the vegetables have totally soften.  Taste the soup and adjust the seasoning if needed.

Finish with a sprinkling of black pepper and the Vegetables & Tomato Soup is ready to serve.  If you want a 100% vegetarian soup, you can...just substitute the chicken stock with water.

I grew up not liking tomatoes, so tomato soup isn't something you'd see me eating (or drinking) all that much but it's beginning to grow on me these days.

But I prefer having a home-cooked one as some I've ordered at restaurants tend to be overly tart.  Once you find the tomato puree that suits your taste buds, you can control and tweak the tartness to your liking.

Especially now that I've found a tomato puree that I like...which resulted in a tomato soup that I thought was rather successful.

I love how soft the vegetables were and that pinch of black pepper was much needed to bring out the flavours of the soup.

And the good thing about this soup is that it keeps really well in the freezer.  The vegetables will get even softer when reheated.  That's the reason why I make extras, so that I can have something in a jiffy when I'm feeling peckish.

Just imagine reheating a bowl of this Vegetables & Tomato Soup...and drinking this warm and comforting soup, while curled up in front of the TV with your favourite show on, in the cool environment of your air-conditioned living room...ah, bliss I tell you! ;)

Serves 3 - 4

Wednesday, 26 October 2016

#ewew cooks Radish Soup 2.0

White radish, when cooked till super soft, is one of my favourite root vegetables.  And who can forget how delicious it is in a dish of braised beef.  Or even better, fragrant pan-fried radish cake.

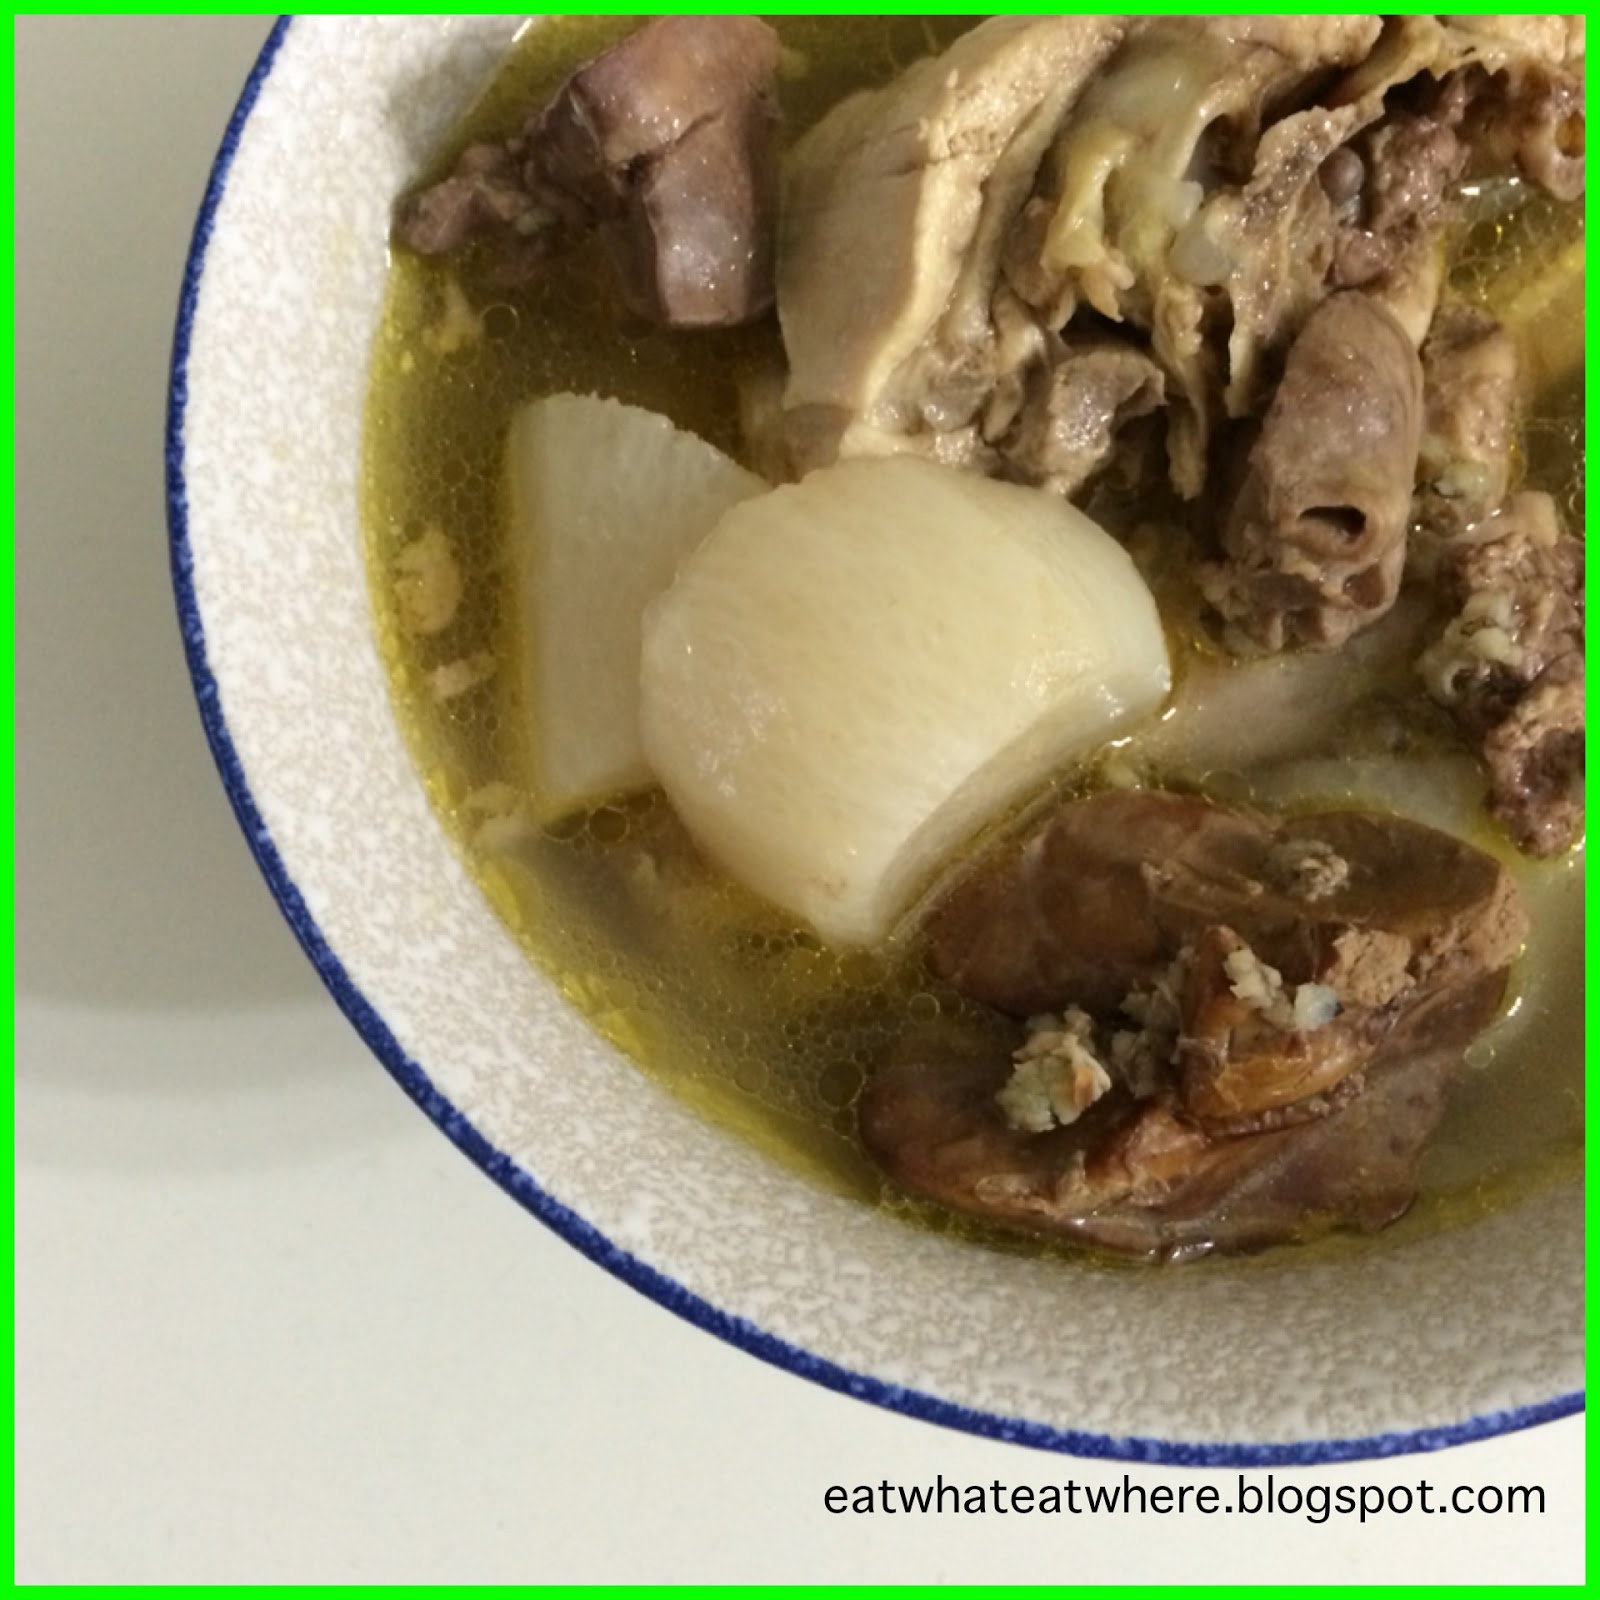
But since I don't know how (+ won't bother) to make those at home, it'll have to be the easy peasy Radish Soup for me then.  I've made this soup before, with pork ribs and carrots (you can check it out here), but I recently tried a new version, with chicken and peppercorn instead, and found that I liked it even more.  So, this is my Radish Soup 2.0.....with just 3 ingredients and I hope you'll like it as much as I do! ^_*

Ingredients:

1/2 a "choi yin kai" (village or kampung chicken)
1 Chinese white radish
1 Chinese tbsp of white peppercorns

Preparation:

I always steep pork ribs in hot water to get rid of impurities and I like to do the same with chicken though you can probably skip this if it's chicken but I still do it anyway.  Unlike pork ribs that need to be steeped for a longer time, the chicken just needs to be blanched for a short while.

Roughly cut the Chinese radish into chunks.

Lightly crush half of the white peppercorns (portion shown here is half) as this will help release more peppery flavour into the soup than whole peppercorns.

Method:

Throw everything into a slow cooker (I use a 1.5L cooker) and pour in hot water until it's an inch from the top. Don't be afraid to use all the off cuts as well like the leg and neck...these give it extra flavour.  Leave it to simmer for a good 4 hours or until radish is soft.

Half way through, I usually check on the soup, give it a good stir and season with salt.  Taste the soup to ensure the seasoning is right.

Four hours later....voila...the chicken and radish pieces should be well soften....and that's it...my Radish Soup 2.0 is ready! ;)

Don't be alarmed by the yellow-coloured look of the soup.....it's not because it's oily as I always ask the chicken seller to remove the skin when it comes to my homemade soups.  Well, there's some oil, of course (from the chicken meat and any remnants of skin that weren't removed), and you do need some in the soup to make it tasty.

But the soup is certainly not overly oily.....see, it's quite clear :)

The yellow hue of the soup is the result of using village chicken which, though more expensive than a "yuk kai" (broiler chicken), is definitely worth the extra we pay (this one cost me RM30) as it results in a much tastier soup than the usual broiler chickens.

The radish chunks are super soft and the chicken pieces will be falling off the bone tender.  Chuck in some chicken liver and heart for good measure! ;)

Look at those crushed peppercorns!  The peppery flavour of the soup is just right (for me)....peppery enough but not as hot as say pig stomach soup.  If you like it hotter, just crush more of the peppercorns.

Heck, I need my carbs.....so, I'd usually have this soup with plain rice ("lou thong sik fan") and make it a main meal.

If you don't intend to finish the soup in one sitting, be advised that the peppery flavour gets more intense as the soup is left to steep with the peppercorns for a longer period.  So, I would suggest that you transfer the soup out of the pot to another pot so that you can discard the peppercorns at the bottom of the pot.

Since making this version of radish soup with peppercorns, I prefer the taste of this one a lot more.  For those of you who enjoy drinking this soup but dislike the aroma of the radish permeating your house when it's cooking, the addition of peppercorns somehow lessen that "smell" and it also helps to make the radish taste a little less pungent.

I like my Radish Soup 2.0 better because the addition of peppercorns make it taste so much better....well, some like it hot! ^o^  Enjoy......

Serves 4 (as a soup) or 2 (as rice with soup) 

Related Posts Plugin for WordPress, Blogger...