Pages

Showing posts with label #ewew cooks: One-Dish Meals. Show all posts

Thursday, 21 November 2024

#ewew cooks Fish Paste Related Dishes

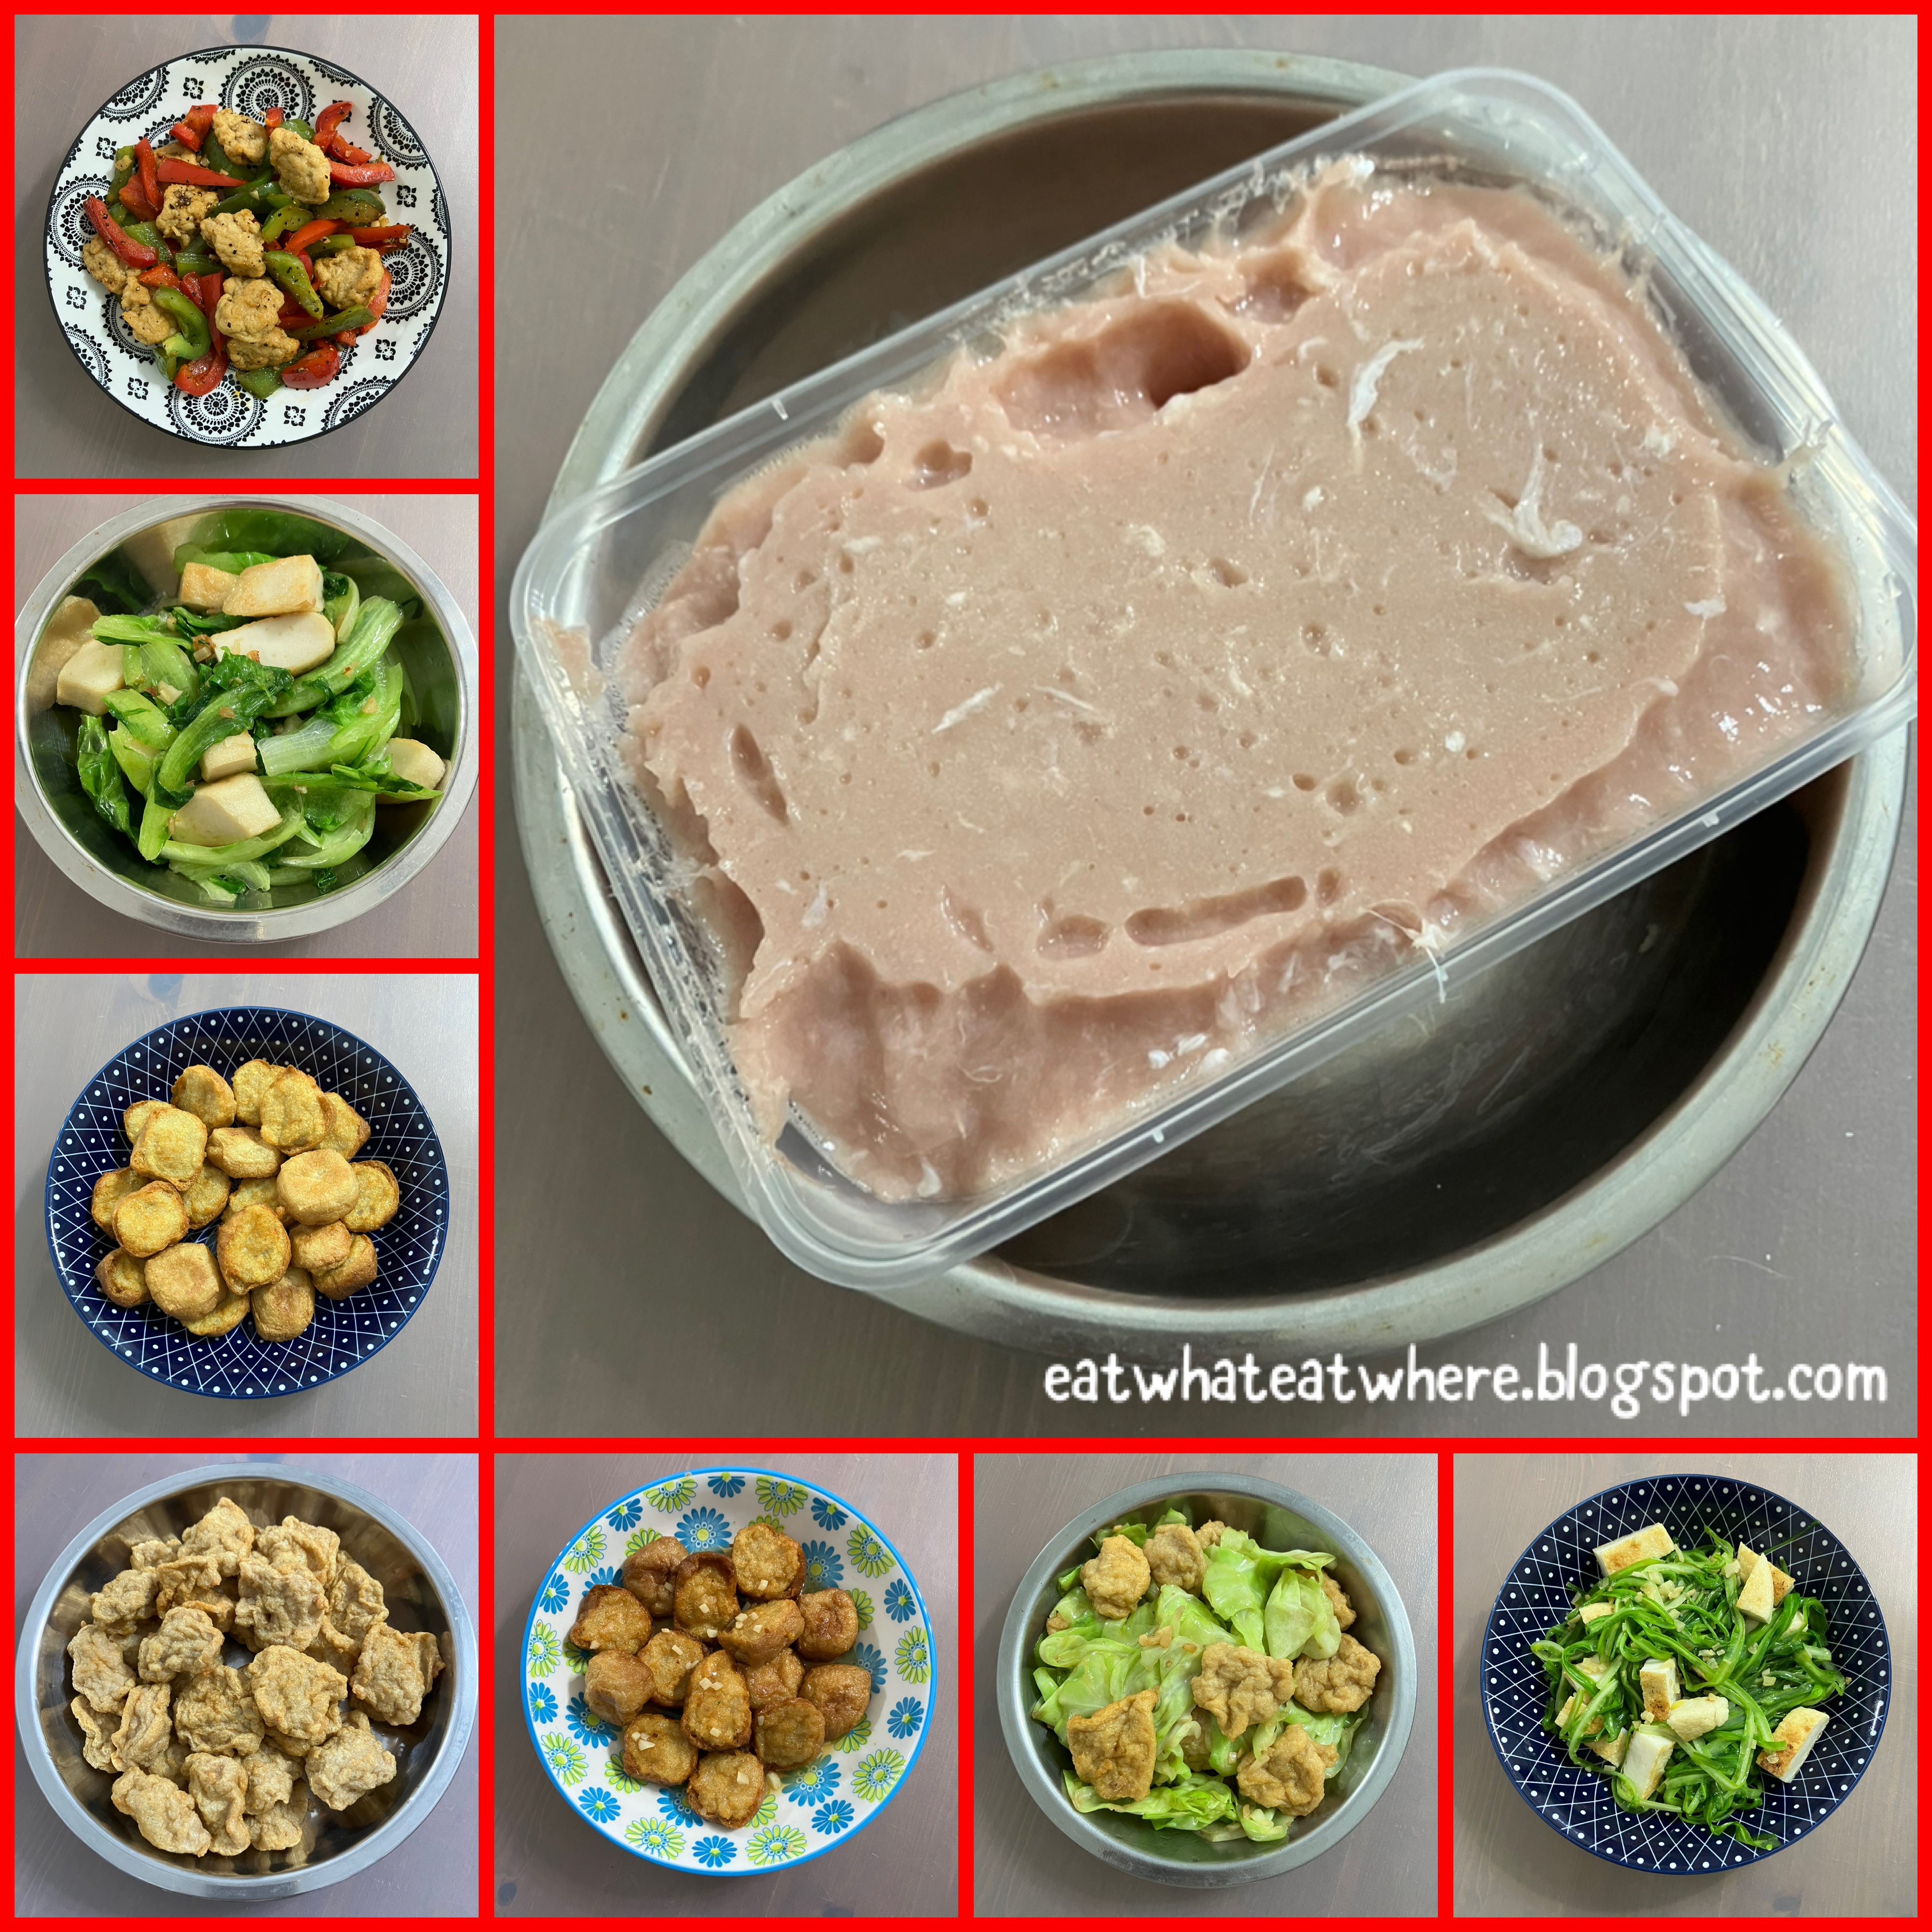
For those who have read my previous post on how much I love to eat fish cake, I now also love to cook them at home.  This was after I found a good ready-made fish paste recently from my fishmonger at the wet market.

It comes conveniently packed in a tub like this and one tub costs RM20.  A small price to pay for something that's very time consuming to make from scratch.  I first learned how to make fish paste from watching my mom do it but made it only once after that...and realised it was too much work...lol! >_<

There are a few types of fish that's suitable to make fish paste (into fish cake or fish balls) such as wolf herring (ikan parang or sai dou yue), narrow-barred Spanish mackerel (tenggiri batang or kau yue) distinguished by its narrow body size with vertical bands, Spanish spotted mackerel (tenggiri papan, some call this tenggiri bunga also ) recognisable by its broader body with spots and yellowtail fusilier (which is the best fish to use according to the experts) while some even use tilapia (the first two are the more common options).  I get a whole kau yue/Spanish spotted mackerel/tenggiri papan and if you can't differentiate (like many of us) which type of mackerel to use (and if you think you can spot the difference between spots & vertical bands, good luck...lol), it's best to just ask the fishmonger for the one that's meant to make fish paste (coz the right one has a stickier flesh when done).  You then get your fishmonger to cut it lengthwise into two fillets for you (leaving the bone in the centre).  When at home, scrape the flesh off the skin (and bones), then use a big cleaver to chop/mince the fish meat finely until it forms a sticky paste.  While doing this, make some salt water (by mixing salt with water, my mom adds a bit cornflour) and season the fish as you chop.  The chopping/mincing part is tedious (I've seen my mom using two cleavers to do this).  Don't waste the unused parts like head, bones, skin and tail as you can make a good fish stock out of them by frying them first before boiling with some aromatics.

For convenience, I just rely on ready-made fish paste coz I'm not willing to go through all the work of making my own.  Of course one of the most common thing you can do with fish paste is to stuff them and make yong tau foo.  That to me also involves too much work...you have to slice up all kinds of vegetables (like eggplant, bitter gourd, ladies finger & chillies) and some are tedious to stuff before deep-frying them, so I'm more into buying ready-made yong tau foo too.  The only yong tau foo I'd consider making (coz it's the easiest) is to stuff them into a tofu puff.  You just need to cut each tofu puff into half and fill it with a bit of fish paste before shallow-frying them.

You can serve them just like this...which I do (since my son loves them this way).  The tofu puff turns out really crispy if you eat them soon after they're fried.

I'd sometimes cook them in a simple sauce of oyster + soy especially if there are leftovers (not that it happens often!).  This is because since they're leftovers and had gotten soft, so it's more ideal to let the softened puffs absorb the flavours of a sauce.

Other than making the simplest form of yong tau foo, I usually just make them into mini fish cakes.  I just shape them into small round pieces by scooping some fish paste into the palm of my hands to shape them (just make sure you wet the spoon and your hands so that the fish paste doesn't stick to your hands).  See how they puff up during the frying process.  But first, as promised in my previous post, I would share with you a little secret/tip on how and why I was served a fish cake that looked deflated.

That's because I've come to know that the fish paste I buy from the market is made with pure fish meat with probably no flour in the mix (or if there is, just very little)...and when it's fried, it puffs up looking like a proper fish cake but once cooled, it deflates and looks all wrinkly.  Those you come across which keeps its shape well (even after frying) probably have a lot of flour to keep the texture firm and the fish cake in shape...and that explains its overly springy/bouncy texture.  I actually love to eat this type of fish cake that's made purely with just fish even though they aren't that pretty to look at.  I usually fry up the whole tub and keep them for use in a stir-fry later with my vegetables of choice.

Just a simple stir-fry with cabbage, I've both protein and vegetables in one dish...which is perfect for me for a one-dish meal which I cook frequently.

You can cook them with any vegetable of your choice...just like I did here with red and green capsicum. Really delicious.

If I weren't able to get the ready-made fish paste from my fishmonger, I'd settle for the ready-made fish cake from Ah Koong whenever I happen to dine there.  Just remove from the package and pan-fry lightly when you're ready to eat them...so simple and convenient! ;)

Again, I use it in the same way...stir-fried with some greens.  I especially like it with green dragon vegetable (ching loong choy).

I also stir-fry it regularly with romaine or cos lettuce (yau mak) or spinach (poh choy).  I like to cut the fish paste into thick slices for a good bite (you can cut them thinly too if that's what you prefer).

So, there you have it...the next time you have fish cake, if it's deflated and ugly looking, you know it's made with (almost) pure fish paste and that's all good (at least to me)...lol! ^_~  But between the two, ready-made fish paste or ready-cooked fish cake, I'd go for the former (even though there's a bit of extra work involved in frying them) since it tastes loads better.  And best of all, you don't have to worry about the seasoning, it comes already seasoned with just the right amount of salty aftertaste.  So yum, so good! ^.^

Friday, 17 March 2023

#ewew cooks Chargrilled Broccoli with Pork

Since someone is waiting with bated breath for me to blog about my latest broccoli dish...her wish is my command (lol), so let me fast track that post to the top of the list then.  For the longest time, I've never really liked broccoli (would much rather eat cauliflower) until I discovered the deliciousness of roasting them (from the same someone) and that's where my love of broccoli started.  My son, on the other hand, prefers broccoli (from the start) over cauliflower (he says he likes the texture of the furry-like buds on the broccoli florets)...the very thing I didn't like at first.

My usual (and only) way of making them is to roast them in the oven to make roasted vegetable salad (together with other vegetables like capsicum and cauliflower) as that's the only way I like to eat broccoli. This I did regularly but you can only pair roasted broccoli if you're having a western-type meal.  Blanching and stir-frying them in Chinese-style cooking is not delicious at all even if there's enough seasoning as it still turns out too bland.  That's why I don't eat broccoli at Chinese sit-down dinners where they're usually blanched and appears as the vegetable component (or sometimes even as a decoration) in a braised dish (those are not only bland tasting but sometimes hard in texture as well).

So, I had to think of some other way of cooking it other than roasting as western meals don't feature as regularly in our daily meals as Chinese meals would.  I had tried stir-frying them and they also turned out not really that exciting since the vegetable itself tastes bland even with extra seasoning.  In the end, I knew I still had to get that charred flavour into the broccoli to make it taste good in a dish you can eat with rice, so that's how my Chargrilled Broccoli with Pork came into existence.

You start by marinating the thinly sliced pork slices with freshly cracked black pepper (lots of it, and I usually just pound the peppercorns in my small pestle & mortar coz that's faster if you need a lot), soy sauce and cornflour (or tapioca starch).....and leave in the fridge until needed.

The next step is to steam the cut up broccoli florets for 5 - 8 minutes (take note that 8 minutes will render the broccoli quite soft, so steam it for 5 minutes if you don't like it too soft bearing in mind that the broccoli will be twice-cooked).  I steamed mine for 8 minutes.  Drain away any water (that's left behind from the steaming) and let the broccoli dry completely (so this should be done ahead of time to let it have sufficient time to dry).  This is crucial in the next step of cooking since wet broccoli tends to steam (and release water) when stir-fried.

Once the broccoli is completely dry, lay the broccoli in one layer over a medium hot pan that has been drizzled with some oil and let it char for between 7 - 10 minutes depending on how well charred you want your broccoli.  If you need to cook a big portion, you'll need to cook them in two batches to ensure the broccoli lies in a single layer in the pan for optimum charring.

The key to a good charring is patience and to resist stirring the broccoli around but let it sear undisturbed for a good 1 - 2 minutes before flipping.  Moving it too much and you'll just end up stir-frying the broccoli instead of charring it.  Once you see the charring happening, then flip the vegetables every now and then.  At this point, you can season the broccoli with just a tiny bit of salt to get the flavours going.

When the charring is almost at the level you want, add in the chopped garlic.  Don't add it in the beginning or your garlic will be burnt by the time your broccoli is done charring.  Once the garlic is nicely browned, transfer the chargrilled vegetables onto a plate and set aside.

Drizzle a bit more oil onto the pan and add the marinated pork slices flat down on the pan to sear/char. Again, resist the temptation of stir-frying and moving them around too much.  The soy sauce in the marinade will help the pork slices achieve a beautiful browning.

Once done, return the charred broccoli into the pan, season to taste with oyster sauce and a bit of light soy sauce.  You can also use a bit of salt or chicken stock granules as seasoning.  Reinforce with more freshly pounded black peppercorns, if required.

Note that because the broccoli needs time to achieve the desired grilled marks, so they'll be cooking for a substantial amount of time in the pan thereby making the broccoli very soft.  That's how both my son and I like it...super soft.  But if you like your broccoli a bit firmer, make sure you steam it for less time (say 5 minutes) or you can even forego the steaming part all together.  Try out a few ways to see what texture suits you (like the one above I did earlier turned out a bit too soft coz I didn't let it dry completely before chargrilling).

What you'll end up with is a broccoli dish where the broccoli is savoury from the soy and oyster sauce seasoning as well as tasty from the infused chargrilled taste.  The well-browned pork slices, with the help of the cornflour/tapioca starch marinade, have a really tender texture too. ^o^

The amount of black pepper you use further amplifies the flavour of the broccoli and pork...and it really depends on how much or how little you want to put (we like lots of it).  If you want a bit of sauce with your dish, then make a cornflour slurry and add that in at the end.  We didn't coz my son likes it dry...and, of course, leaving it dry enhances the grilled flavour in the broccoli even more.

If you like, you can even add on some carrots and capsicums or switch the pork with beef and you'll know the black pepper works just as well with beef.  Or you might even want to cook it as a stand-alone vegetable dish.

Who new a western-style salad of roasted broccoli can also be adapted to become a Chinese dish of chargrilled broccoli itself (or with pork) which you can pair with rice...and the flavour works really well with black pepper.

This has now become my son's favourite vegetable dish.  Needless to say I've been cooking this often.  He says he can eat just this one dish alone and I can understand why coz it's one of those dishes that's perfect as a one-dish meal.  Well, I certainly won't mind cooking only one dish...just need a little time and patience to get the broccoli to char nicely.

Next time you're looking to make a one-dish meal complete with meat and veggies (and broccoli happens to be a your favourite veggie), you may want to consider cooking this.  You can bulk up on the portion of broccoli and pork (or beef)...and have that with a small bowl of rice (like we did) or even totally forego the rice for a carb-less meal. ^_~

Related Posts Plugin for WordPress, Blogger...